how to make the cube pin cushion
So, there are several tutorials online for making the round pincushion with the buttons in the center. (round pin cushion) but I want to make the cube one so how do you do that? Well it turns out it's almost the same. Some of the pictures are yuck so I will try to replace them with better ones.
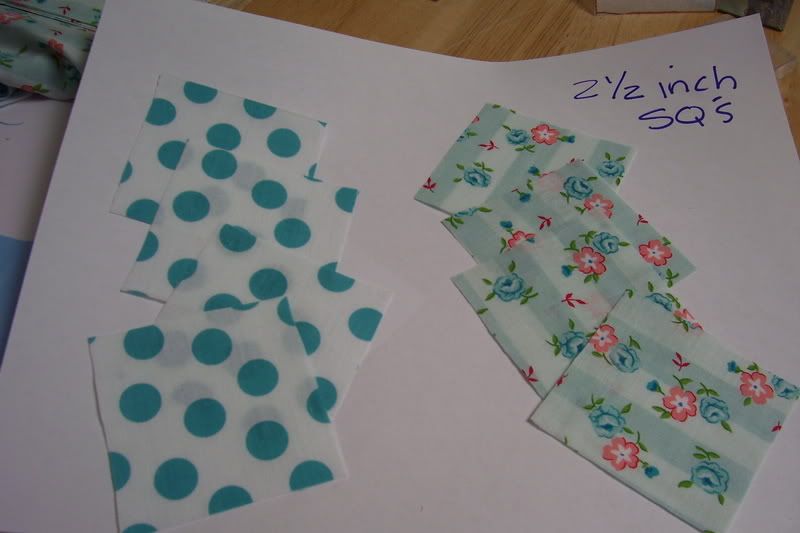
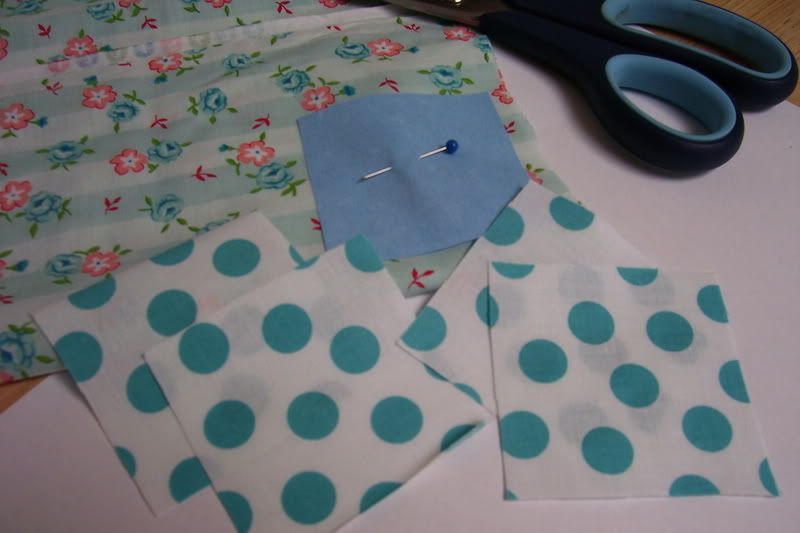 I am using two fabrics but I think the next one I will use four. Cut out 4 squares from each fabric that are 2 1/2 inches, you need 8 squares total. If you want a bigger or small cushion change the size of the square.
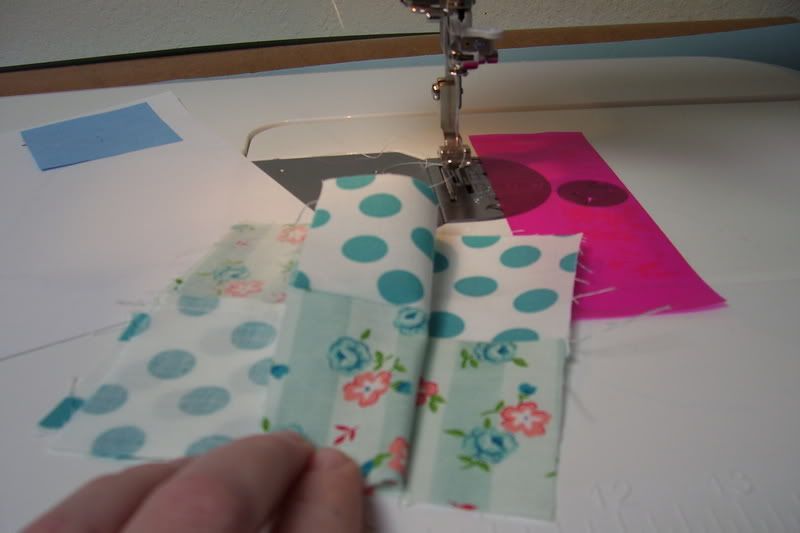
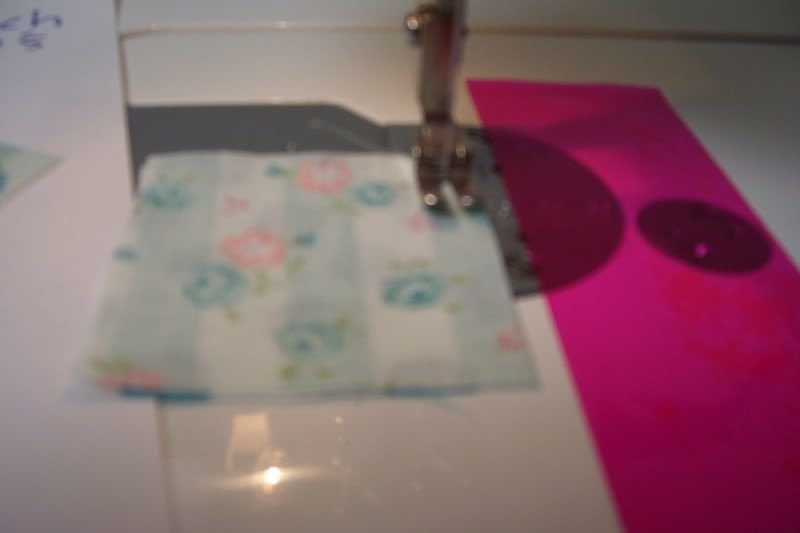 Now take one of each fabric place the right sides together and sew along one side using a 1/4 seam. Press it open. repeat for all your squares. next lay two pairs right sides together and alternating the print the sew along the lond side press open. repeat for the 2nd set.
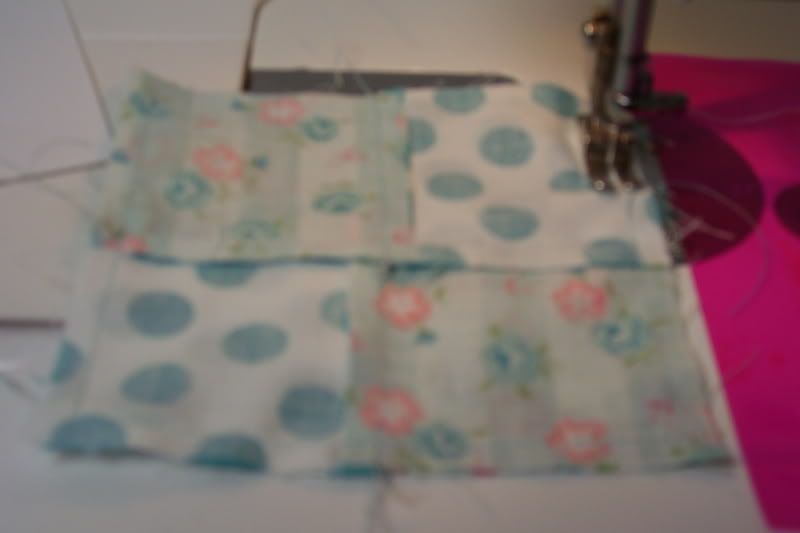
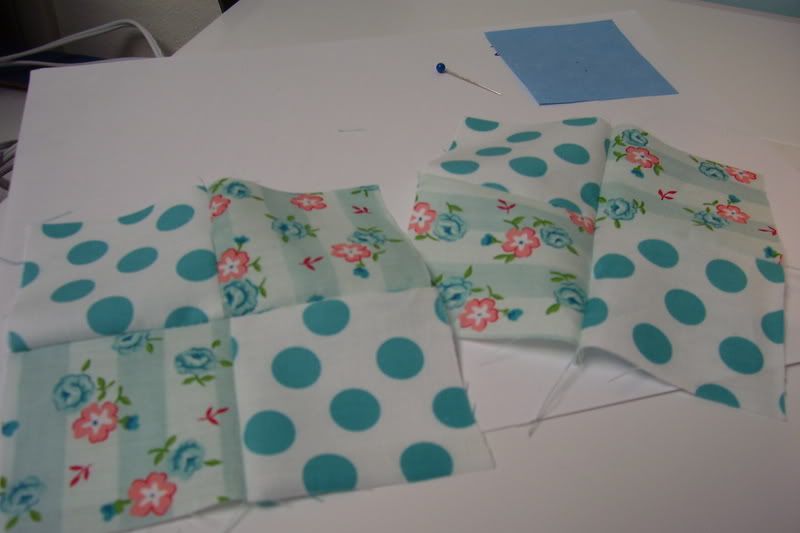 Make two of these, one for the top and one for the bottom.
 Next place your two pieced squares right sides together. I wanted my fabrics to match so that it looked like four cubes sewn together but you could do it the other way if you wanted.
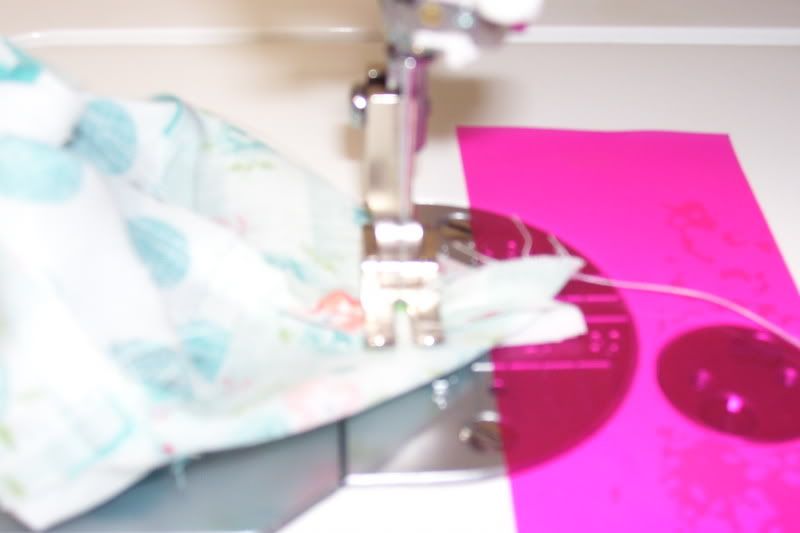
 Now sew around the four sides leaving an opening so you can fit a finger in there and also so you can turn it.
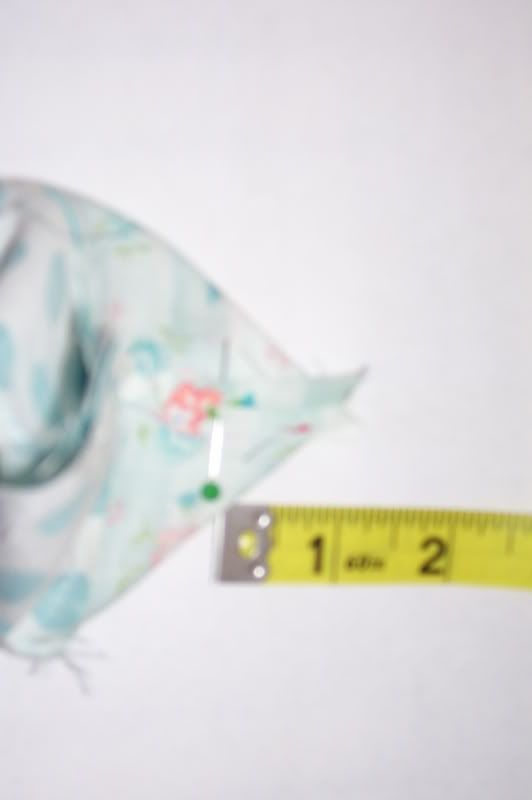 Now its time to make the mitered corners. with the wrong sides still facing you, you want to flatten the corner so that the two side seams lay on top of each other. It makes a point. Measure down about an inch or so and put in a pin. This distance is what decides how tall your cuchion will be. Do you want it shorter, then meke it more like a 1/2 inch. Just be sure all four corners are the same. Then you will sew across this spot, be sure to backstitch.
 Here it is with all four corners done, before it is turned out.
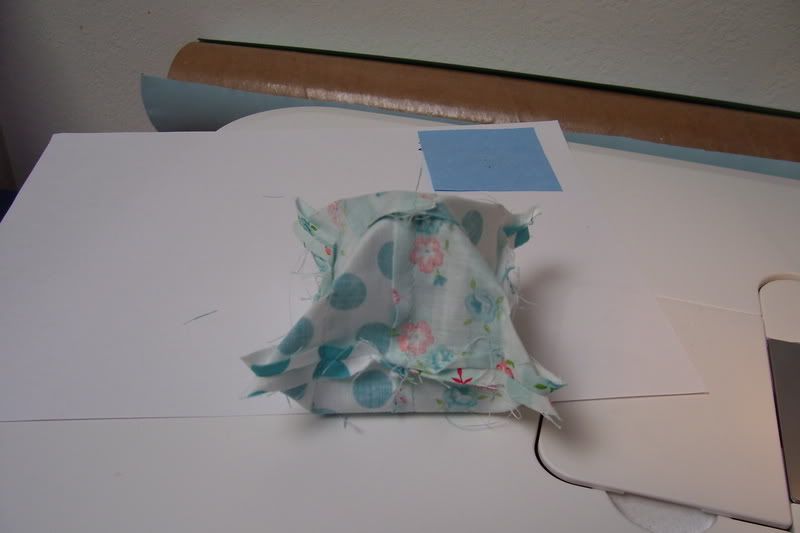 Turn it right side out, Be sure to really poke thos corners so that it is a cube. Here it is not stuffed.
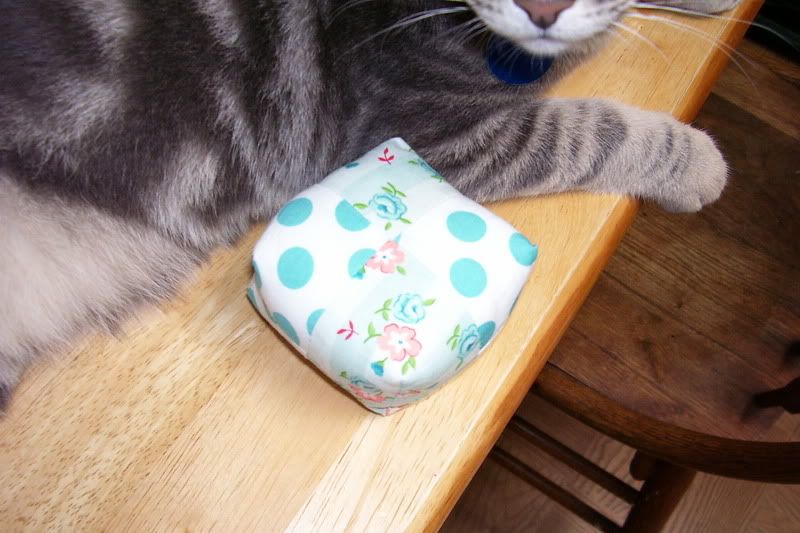
Then stuff it.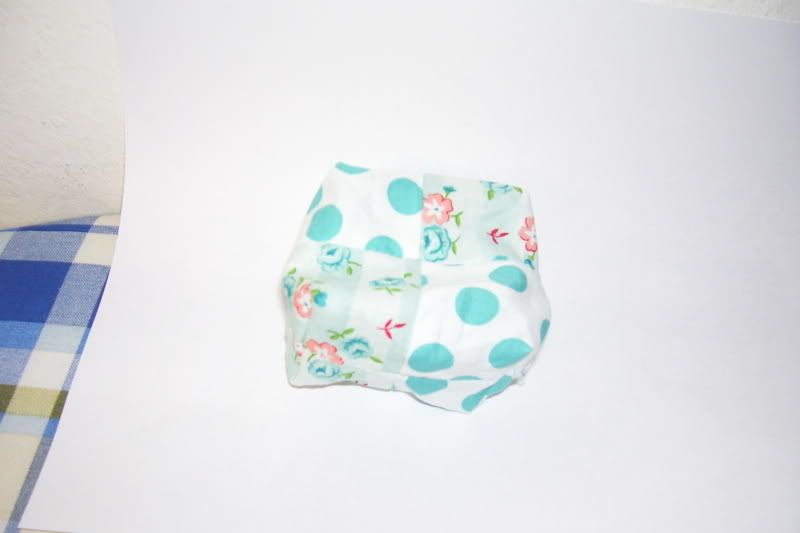 Next chase it away from the cat. I went to find the a needle and thread and my cushion was gone. Aparently these make great cat toys too. Maybe put some catnip in there although Sydney likes it just fine without. Now hand sew that little opening closed.
 The last step is to take a needle and thread and sinch it up. Cut a longggggg piece of thread double it, thread it into a long needle and poke the needle through the very center of the bottom. Bring the needle up into the center of the top now go around the cushion and bring it back up through the bottom. Continue to go into the bottom and out through the top always going along a side seam. The tighter you pull the more thoes lines show.
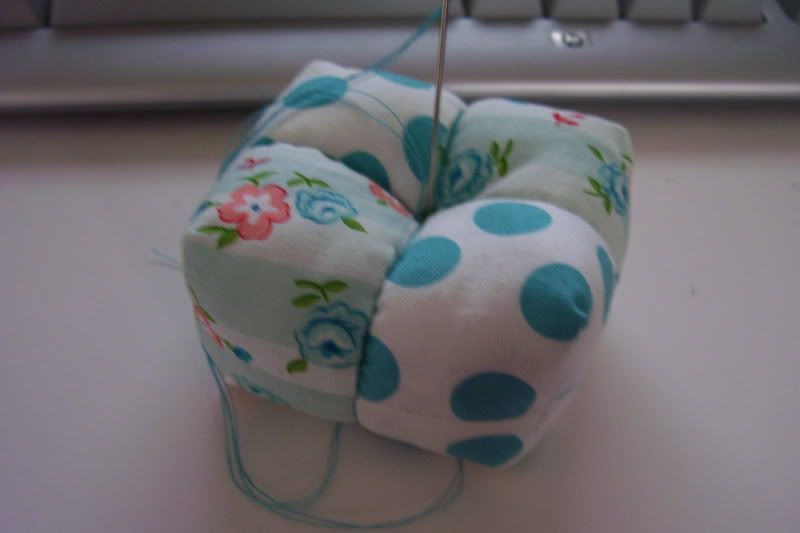
Now all you need is a button or two or three. I don't have any cute ones so I'll have to find some. I'm also wondering if using embroidery floss for that last part would be more fun?
Have fun!! I'd love to see what others do with this.
I am using two fabrics but I think the next one I will use four. Cut out 4 squares from each fabric that are 2 1/2 inches, you need 8 squares total. If you want a bigger or small cushion change the size of the square. Now take one of each fabric place the right sides together and sew along one side using a 1/4 seam. Press it open. repeat for all your squares. next lay two pairs right sides together and alternating the print the sew along the lond side press open. repeat for the 2nd set. Make two of these, one for the top and one for the bottom. Next place your two pieced squares right sides together. I wanted my fabrics to match so that it looked like four cubes sewn together but you could do it the other way if you wanted. Now sew around the four sides leaving an opening so you can fit a finger in there and also so you can turn it. Now its time to make the mitered corners. with the wrong sides still facing you, you want to flatten the corner so that the two side seams lay on top of each other. It makes a point. Measure down about an inch or so and put in a pin. This distance is what decides how tall your cuchion will be. Do you want it shorter, then meke it more like a 1/2 inch. Just be sure all four corners are the same. Then you will sew across this spot, be sure to backstitch. Here it is with all four corners done, before it is turned out. Turn it right side out, Be sure to really poke thos corners so that it is a cube. Here it is not stuffed.Then stuff it.
Next chase it away from the cat. I went to find the a needle and thread and my cushion was gone. Aparently these make great cat toys too. Maybe put some catnip in there although Sydney likes it just fine without. Now hand sew that little opening closed. The last step is to take a needle and thread and sinch it up. Cut a longggggg piece of thread double it, thread it into a long needle and poke the needle through the very center of the bottom. Bring the needle up into the center of the top now go around the cushion and bring it back up through the bottom. Continue to go into the bottom and out through the top always going along a side seam. The tighter you pull the more thoes lines show.Now all you need is a button or two or three. I don't have any cute ones so I'll have to find some. I'm also wondering if using embroidery floss for that last part would be more fun?
Have fun!! I'd love to see what others do with this.
posted by Stephanie at 3:43 PM
![]()

3 Comments:
This is great! I'm going to make one of these as soon as I can!
Thanks for the tutorial, I made one yesterday and you can see it on my blog if you like to.
And you are perfectly right:
it looks nice with embroidery floss
cats love them!
http://borsedigaya.blogspot.com/2007/02/puntaspilli-cubico.html
Gaya
Thank you for the tutorial. I will definitely try making one of these, possibly later this evening, hopefully will get some pics taken and post it on my blog. I'm a new sewer, very new, so love projects like this!
Post a Comment
<< Home